Hi friend! Today I am excited to share another DIY project featuring P Graham Dunn. This project requires a little bit of stain, a little bit of paint, and a lot of love! And of course, this house shaped wooden sign from P Graham Dunn. Their craft decor is oh so fabulous because it is all totally customizable...the possibilities are seriously endless! It is always so fun to come up with new ways to use their products and to share with you. I hope you'll join in on the fun!

Here's the list of supplies that you'll need for this project:
-Any color of wood stain
-A few colors of acrylic paint (Choose colors to match your decor! I used shades of pink, moss green, purple, yellow, aqua, orange, and white).
-Paint brushes (I used a tiny skinny brush for the lettering and a medium sized brush for adding all the color!)
-Rag or craft sponge for applying stain
-Painters tape
-Sealant of some kind (I used Kamar Spray Varnish)
-White colored pencil

Now that you've gathered all of your supplies, let's create!
Step 1:
Stain your wood. This step is so easy! Just dip a rag, paint brush, or foam sponge into your stain and swipe across the wood. You might want to wear gloves for this step, as most stain is fairly difficult to wash off of your hands. Totally optional! Be sure to cover the entire piece, including the sides. Allow to dry for several hours.
Step 2:
Before you add paint to the sides, it's a good idea to use painters tape around the edges so you don't get paint on the front sides of the house. If you're not a messy painter, you can skip this step. If you're like me, however, and tend to get paint everywhere, be sure to tape those edges!
Step 3:
Let's paint! I chose to use a medium sized flat brush for this step. This step is fun because you can add as many different colors as you'd like! Just brush on sections of color on all edges. I used a downward swipe with each brush stroke to create a consistent, colorful look. Allow to dry.

Step 4:
After your paint has dried, you can take the tape off. Now we're going to add paint to the front and back sides of your house! For my project, I chose to paint the words "home sweet home" on the front side and a colorful heart on the back. (Of course you can completely customize this step as well-there are SO many cute "home" themed quotes. I would suggest using your white colored pencil to outline your heart and the words before adding paint.
To create the look of my lettering, I used a tiny, skinny paint brush. This helped me achieve the style of lettering I desired for this project.
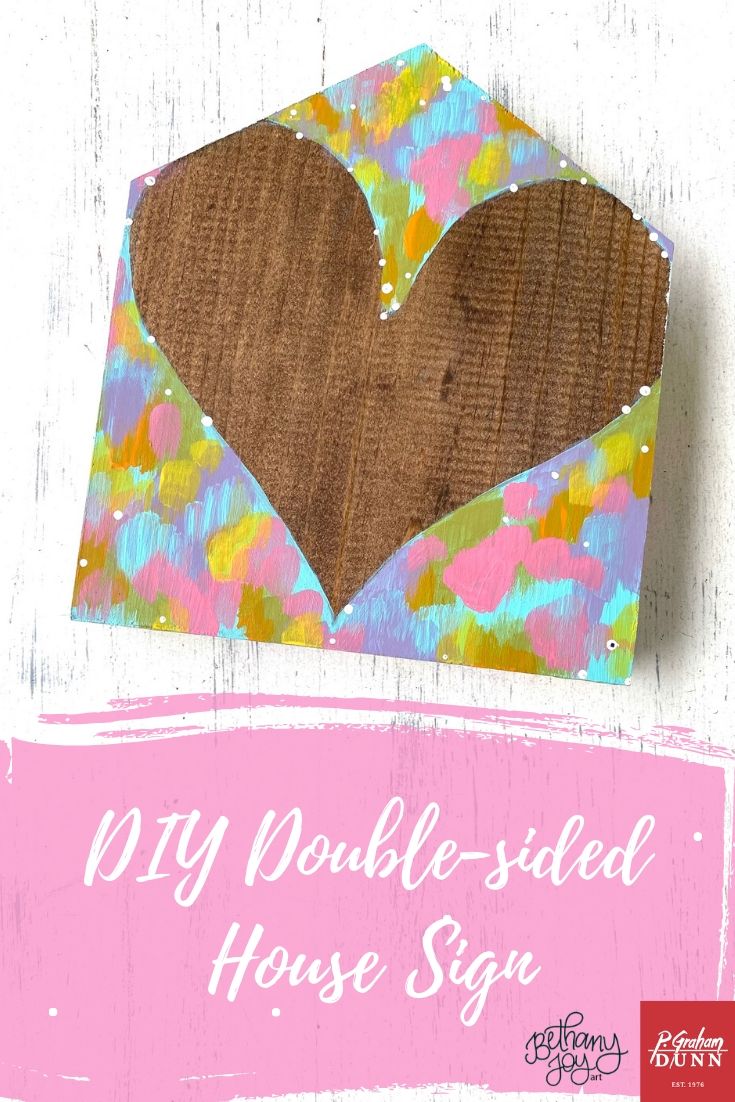
I chose to paint the heart with the inside remaining as stained wood and the outside edges to be colorful. I outlined a heart in white colored pencil and then added the same colors used from the edges. Think of it like the edges are spilling over to create a fun heart shape!


Step 5:
After you've allowed your project to dry completely, simply use your varnish to protect your lovely work of art. The varnish I use has just a touch of gloss, so it really makes the colors pop!
That's it, friends! Now you've got the cutest "shelf sitter" art for your home! And guess what? P Graham Dunn has graciously offered the coupon code "JOY" for 15% off your entire order! They have so many fabulous products that I know you'll love.

P.S. I recently had the opportunity to actually meet some of the awesome team from P Graham Dunn at the Atlanta Gift Show earlier this month! What a great experience! Everyone was SO nice, their showroom was absolutely gorgeous, and they even personalized a journal and pop socket for me (and my mom!) using their super cool laser engraver. I can't say enough good things about this amazing company...it is a true honor to work with them and share them with the world!


Thanks so much for checking out this DIY blog post! Happy creating, friends!

*this post was sponsored by P Graham Dunn