
Hi friends! I’m so excited to share today’s lovely, simple DIY project in collaboration with P Graham Dunn! If you’re like me, this time of year makes you want to craft even more. You love giving handmade gifts and are always looking for fun and easy projects to make for your loved ones.
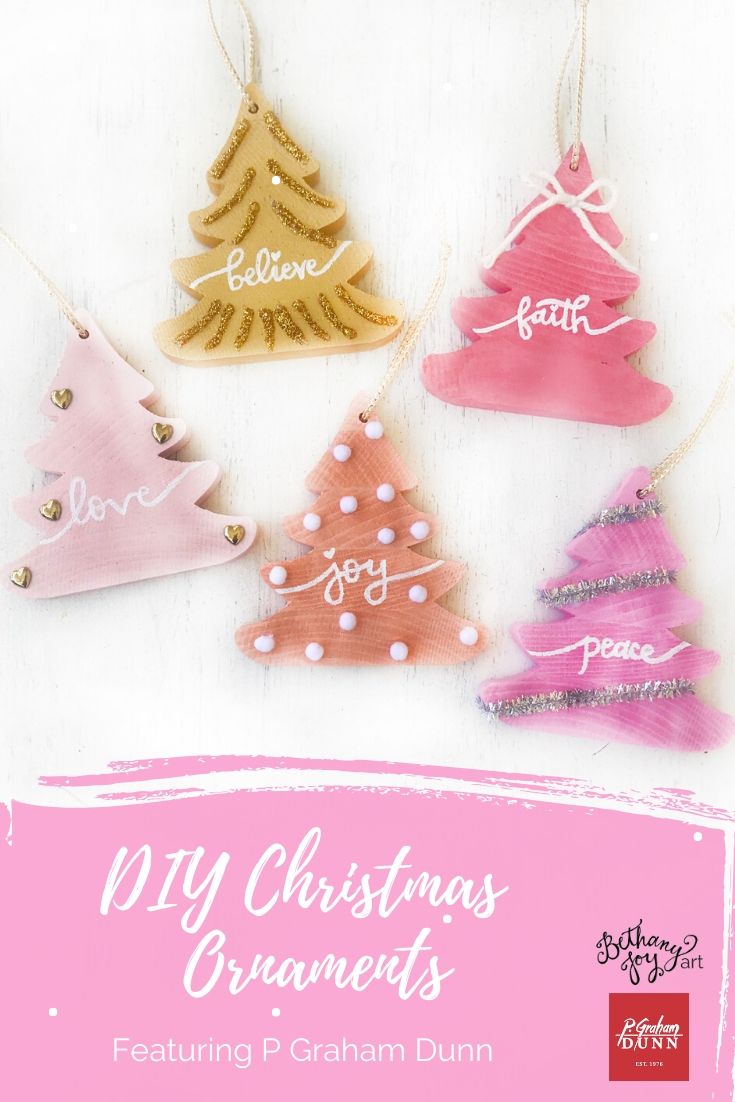
Ornaments are the perfect solution! Easy to make and customize, something you can be proud to gift, and something to be oh so cherished by the recipient. Today I’m going to show you how to easily customize these wooden Christmas tree ornaments from P Graham Dunn. Be sure to check out this link to grab your fabulous trees before we get started. (P.S. you can use the code JOY during checkout for 15% off your purchase...isn’t P Graham Dunn the best?!)
I’ll share my supply list below...the good thing about this project is that I used a lot of little supplies that you probably already have at home!

You will need:
-Wooden Christmas Tree Ornament Blanks from P Graham Dunn
-Acrylic Paint (I chose blush, pink, coral, peach, and metallic gold...oh, and white for lettering)
-Paint Brushes (one medium brush and one tiny brush for lettering)
-Mini White Pom Poms (mine are from JoAnn)
-Metallic Silver Pipe Cleaner
-White Yarn
-Gold Metallic String
-Metallic Gold 3-D Heart Stickers (also from JoAnn)
-Hot Glue
-Gold Glitter

I’m going to be showing you the exact steps I took to make my set of 5 ornaments, however, this project is completely customizable...I’m sure you have some fun ideas for decorating your trees as well so feel free to use different colors, etc. and show us how you made yours!
Alright, let’s have some fun and create!
Step 1:
The first thing you’ll need to do is to paint each tree a base color using your acrylic paints. I decided to paint two coats for each and also decided to paint the front side and the back (even though I only decorated the front side of each...the backs of each ornament are still painted too). Allow your trees to dry before moving to the next step.
Step 2:
Use your tiny brush and white paint for this step. I chose 5 different words that I love for Christmas and lettered one word on each tree using the acrylic white paint. If you’re not a pro at lettering (yet...practice makes perfect!) then feel free to use small letter stickers for this step (available at any craft store). If you did choose to paint your words on, set the ornaments aside to dry before moving on to step 3.
Step 3:
Now it’s time to add embellishments to our trees! This step is my favorite for sure.
Feel free to customize these embellishments to fit your needs as well of course!
- This might be the easiest of the 5 tree decorations. Add the gold 3-D heart stickers to your tree wherever you see fit. I added mine to the tree that says “love”.
- Cut a small piece of white yarn and tie a bow, add the bow to your tree using a small bit of hot glue.
- Use hot glue to add mini white pom poms on one of your trees! I chose to add the poms to my “joy” tree because pom poms just make me smile.
- Draw lines with hot glue and add gold glitter on top. Be sure to do this step over top of some scrap paper or a plate so that the glitter doesn’t get everywhere when you brush the excess glitter off.
- Bend a sparkly pipe cleaner around your tree to measure and cut. You should have enough for three pieces from one full sized pipe cleaner. I made sure each piece had enough to fit around the sides but not the back. I used hot glue to secure each piece into place to make some cute garland for my tree!
Step 4:
Thread some ribbon or string through the holes of each tree so that you can hang them up! You could choose any type of thin string for this step, I chose some sparkly gold string and tied in a knot. You could also tie each one in a bow if you wanted.
Step 5:
Hang on your tree or gift wrap them up! (stay tuned for a fun blog post coming soon to add some joy to your gift wrap, too). These ornaments are sure to delight your friends and family as you share them this year!
P Graham Dunn truly has some amazing products for all your crafting needs this season and we love seeing what you create! Be sure to give their website a visit and share what you make by tagging us on social media: @pgrahamdunn and @bethanyjoy_art
We are both always so thankful for your support! Happy creating!


*this post was sponsored by P Graham Dunn