Sweet friends! I just know you are going to love my next DIY project showcasing another wonderful product from P Graham Dunn! This month, I’m going to walk you through my process of creating a fabulous “Love Always” wooden sign for your home.

Let’s get started with the list of supplies you will need:
-Acrylic paint in assorted colors of your choice - I used: grey, white, hot pink, peach, light blue violet, bright aqua green, and lime green.
-Paint brushes: I used a 2 inch brush for the background and a smaller brush for the letters
-Mechanical Pencil
-Sawtooth hanger (to add to the back for wall hanging) + hammer + nails
-Clear Coat - I used Kamar Varnish Spray.
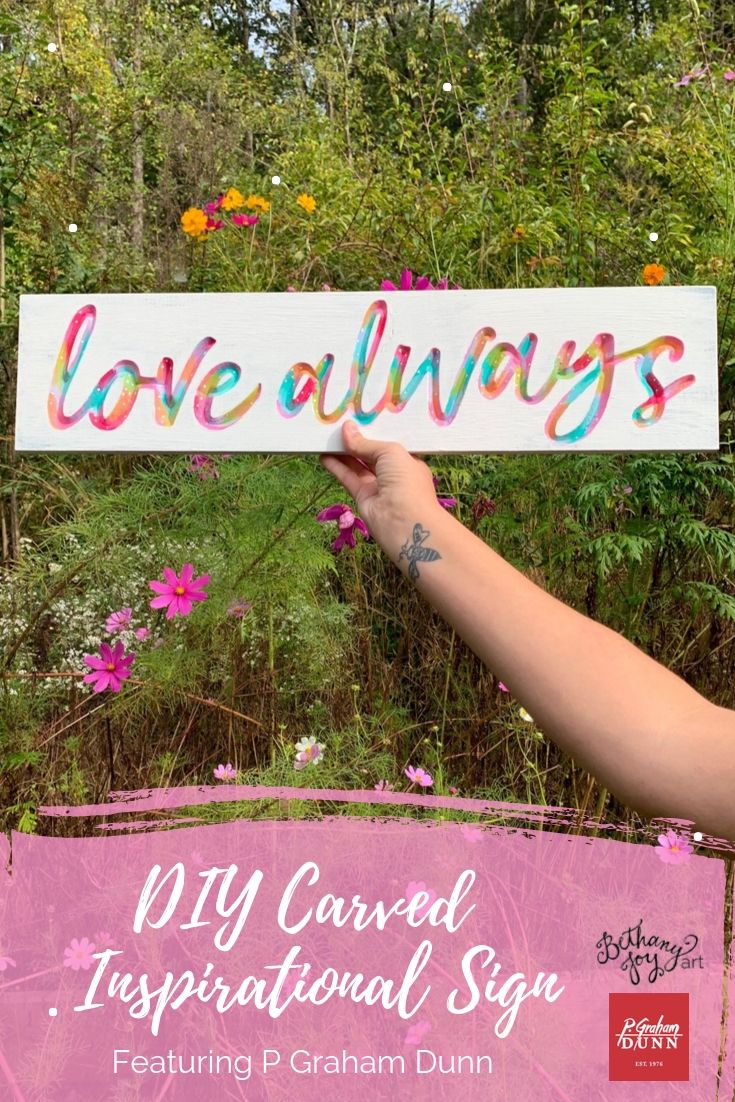
-“Love Always” Carved Wood Sign from P Graham Dunn (or word sign of your choice from P Graham Dunn*)
*Did I mention that you can choose from a wonderful selection of word signs from P Graham Dunn? Their word signs are truly awesome because the letters are uniquely CARVED into the wood! Here’s a list of words available with the links to the product: blessed, you & me, gather, love always, family, home, and welcome.

When you’ve got all your supplies, we’ll get started! Please keep in mind that you most definitely can customize your project with the colors of your liking. I used my personal favorites, but think of how cool this sign would be in shades of blue for a beach home or in neutral-toned colors for a more simple feel...the possibilities are endless and oh so beautiful!
Oh, and just in case you were wondering, I’d definitely say that this is an easy project that anyone can do! You’re going to love the process and the results.

Step 1: Paint entire sign one acrylic paint color, (for this step, I chose grey). Make sure the paint goes inside the carved letters and remember to paint the sides, too! Allow time from the paint to dry.

Step 2: After the first solid layer of color dries, use a 2 inch wide rough bristle "chippy" brush to paint the second color of acrylic paint, (I chose white). This brush will allow you to “see through” to some of your base coat color because the bristles are more spread apart. You can see the details of what I’m talking about in the image below. This brushing method allows for more of a distressed/rustic look. Once you’ve got this coat painted to your liking, you’ll want to set it aside to dry completely before proceeding.

Step 3: This is where the process gets really fun! Choose several acrylic paint colors for your letters. The paint colors I chose are hot pink, peach, light blue violet, bright aqua green, and lime green, along with white for mixing shades of each color. You should select a small/medium sized brush to add your colors to the carved letters. It can get tricky keeping the paint from getting “outside the lines”, but we’ll touch it all up later.
Begin painting with one color, adding brush strokes throughout each letter. I continued adding each color until all the letters were filled in with all of the colors. I ended up painting a second coat of each color as well to blend my brush strokes making everything look more smooth. Once you’re satisfied with all the colors in your letters, set it aside to dry once more.
Step 4: Touch ups + details! You’ll want to grab a small brush and your second base color (white for me), to go around the edges of all of your letters and touch up any spots where the colors might have gone outside the lines.
Bet you were wondering what that mechanical pencil on the supplies list was for, too, weren’t you? This is my favorite tool for adding tiny white polka dot details to my paintings! You’ll want to make sure the led isn’t in use, then dip the tip of your mechanical pencil into the white paint (or whatever color), and add dots wherever you’d like to create extra whimsy in your letters!
Step 5: After your sign is completely dry, spray on a coat of Kamar Varnish just to be sure your sign is sealed and protected. You also might want to add on some wall hanging hardware to the back of your sign. Pictured below are some options you could consider, depending on how you’re planning to display your sign. The sides of this sign are thick enough, however, that it could stand alone on a shelf, too.


That’s it! I told you this project was easy! Do you love your new hand-painted home decor?
P Graham Dunn truly has some amazing craft decor products for easily creating unique pieces of art for your home. They’re so generous as well and are offering all of you 15% off their entire site! Just type the code JOY in during check out to enjoy their sweet gift.
If you create this project, please be sure to share and tag us on social media: @pgrahamdunn @bethanyjoy_art. We’d both LOVE to see your artistic creations!


*this post was sponsored by P Graham Dunn
1 comment
Love the sign can I order straight from Graham Dunn or can I order from Michael’s or hobby lobby?